
Showing posts with label alphabet. Show all posts

Tuesday, March 10, 2015

Keyboard Geography: Get Crafty with Alphabet Gems


Hey Yellow Arrows student, have you cut out your Alphabet Pieces yet? You do not want to let this valuable activity fall by the wayside: these little scraps of paper are a powerful learning tool AND we will even show you how to cutesy them up!

Keyboard Geography
Back in the fall we introduced the idea of Keyboard Geography: Looking at the keys and noticing the patterns made by black and white keys.  The black keys are SO important because without them, you'd have no way to visually distinguish the C's or F's or any keys at all!  

You can guess that eventually your pianist will want to play songs without looking at her hands much, but before she gets to that point it is valuable to spend some serious time now looking at, learning, and internalizing what the keyboard looks like.  Eventually, she'll be able to hold the image of where her fingers are (and where they need to go next) in her mind's eye.  Combining her mental image of the keyboard with her muscle memory (read about it here and here) she'll be able to play without looking down very often.

Visual and Kinesthetic Learning
In class, your child practices singing the musical alphabet to learn the pattern of the keys, and practices the Kit-Kat Keyboard chant to start practice matching the keys to the keyboard.  Both of these activities are primarily aural but become a visual way of learning when keyboard matching comes into play.  To strengthen the learning, we provide even more pathways (read about the learning process here) for mastering information by giving students kinesthetic ways to play with the skills.

Alphabet games help make drilling "what's the name of this key?" fun and engaging AND because they involve your child moving a tangible object over to a tangible key, this knowledge sticks better than if we only used flashcards.  

Whenever possible, take it one step further by playing the pitch of the note after identifying the alphabet letter, and matching it…"Yes, that was a D, and a D sounds like this…DEEEE."  We try to find ways to see it, hear it, and get physically involved as we practice it.

Where Do We Go Next?
Next fall your student will start learning to read every single note on the staff, and match each note to its exact key on the keyboard.  Of course, it's going to be a very rough challenge if your child reads "treble D" off the staff but can't find a D on the keyboard.  This is one reason we spend time on key names now; it's the prerequisite for advanced music reading.

I like to point out that the alphabet names of the notes and keys are an abstract concept created to help us read music.  It IS possible and necessary to read music by matching "that note" with "that key" correctly without identifying the name of "that note".  (Read more about it here)

But these key names are critical to give us the way to talk about the notes and keys and be specific as we teach the advanced theory coming next year (changing key signatures, transposing, adding sharps and flats, etc.) 

Great Ways to Play
Now that you're motivated, you'll definitely want to check out the list of different games using alphabet pieces. (CLICK HERE).  You'll see everything from Cowboys and Indians to Frogger and Go Fish: all games that will encourage visual matching and active learning.

Get Crafty
Now, for a crafty way to make your pieces the cutest and most gorgeous ever (also preventing them from falling between piano keys,) try this option: making Musical AlphaGems! 
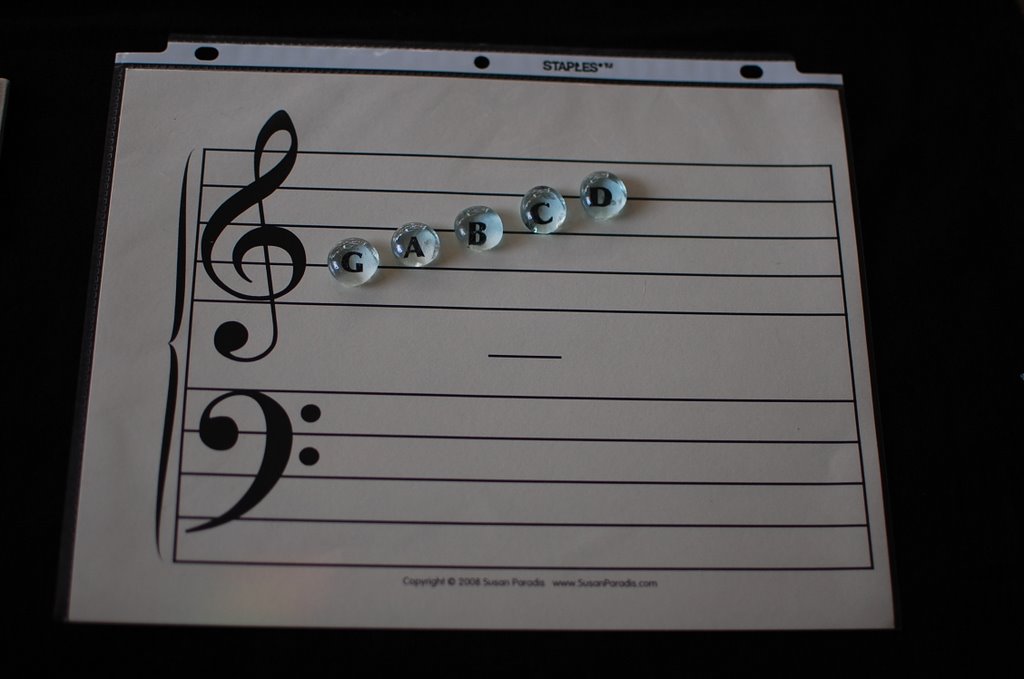

Materials
  • Clear glass gems (each approx. 1/2 inch in diameter): avoid ones that are too big to fit on your piano key!
  • Cardstock alphabet (last page of your Yellow Arrows songbook)
  • Acrylic spray (option)
  • Clear silicone adhesive (sticks well to glass and is less smelly than other strong glues)
  • Workspace covered with some newspaper
  • Scissors
Instructions
  1. Optional: Before cutting out the alphabet circles from the printable, spray the backside of the cardstock paper with a few coats of acrylic spray.  This will help seal the paper and make your gems last longer.
  2. Using a pair of scissors, cut out alphabet circles to fit your gems.  Too small is better than too big.
  3. Examine each glass gem before using to check for imperfections.  Toss any that are chipped or have odd designs that might affect how easily you can read the alphabet letter through the glass.
  4. Put a dab of silicone glue on the bottom of a glass gem and then gently press the gem onto a cut-out circle so that the printed alphabet letter shows through the glass.  Gently wipe the gem’s edges on the newspaper workspace to remove any excess glue.  Allow the gems to dry upside down.
That's it!  Go have some fun with your alphabet games.

-Gina Weibel, M.S.
* Musical AlphaGems was first seen at www.colorinmypiano.com

Tuesday, February 18, 2014

Keyboard Geography: Alphabet Pieces Games


Second year students are ready to create their ALPHABET PIECES and use them in fun games for learning the white keys.


CUT the rectangle of alphabet letters out of your yellow songbook.  YES, cut your book!  Trim a piece of adhesive-back foam (like this kind) to match the size of your letters.  (If you happen to be making a bunch of these, you can fit 3 rectangles on a 8"x12" foam sheet.)  Affix the letters to the foam. 

Need a replacement printout of the letters? Grab one HERE.

Next, cut the strip of Cs, trim them apart, and have your child place each of them on a C on the piano.  Repeat with D, and each letter, then brush them off and store them in a cute box or container on your piano.  

Now you're ready for some fun!  *If you decide to skip the foam, that's okay, too.  In that case, to prevent papers from falling between the keys, always brush them off toward you.*

At the beginning of each practice, play an alphabet games for 2 minutes to get warmed up.  Here are a few games to change it up each day of the week.

Alphabet Race:
Have your child take one alphabet piece from the box and quickly set it on the correct white key.  Continue until the box is empty!  Time yourself and see if you can beat yesterday's time.  For students who struggle, have the student look at the picture (key-group diagram) in the back of the Yellow Songbook and form his own visual conclusion.


Take a Second:
Have your child choose two alphabet pieces and place them on the keyboard.  Identify what interval they make, and play the interval.  If it's anything other than a 2nd, play again!  The game ends when you take a second to make a 2nd

Alpha-frogger:
Pretend each alphabet foam piece is a tiny frog.  Have your child choose an alphabet frog, then hop it across the keyboard helping froggie find all keys of that letter. These frogs don't croak- each time the "frog" lands on one of her special lily pads, sing the letter (on pitch!). 

Hiss:
Place one letter on the keyboard as a starter snake.  Each player takes turns drawing a letter and checking to see if they can add it to the head or the tail with baby steps to make the snake longer.  If not, start a new snake somewhere else on the keyboard.  Anytime someone makes a snake with 8 or more segments, they get to remove it from the keyboard and keep the points (1 per segment)! Play until the pieces run out.  It's pretty cool if you are able to join 2 snakes by drawing the missing link between them, and win a really long snake!  You might enjoy non-piano Hiss, too.

Go Fish:
Each player starts with 3 alphabet tiles hidden in his hand.  Try to make matches by asking the other player: "Do you have a.." then PLAY the note on the piano to make your request.  If you end up with an empty hand, draw 3 more tiles.  Keep playing until the tiles are all gone, and see who got more matches.

Silly Songs:
Have your child draw out 5-10 alphabet notes and line them up along the music stand.  With her right hand in C position, play each note with the finger touching that key.  If the note is a B, slide the thumb down to yellow position to reach it;  if the note is an A, slide the hand into blue position to reach it.  This might be a wacky song, or it might be something cool.  If you like the tune, play it again!

Super Skippers:
Your child draws out an alphabet letter and places it on the keyboard as a 'starter'.  Next, she chooses another piece and checks to see if it can make a skip up or a skip down from the starter.  If not, discard it and player 2 gets a turn to play (player 2 should start her skipping chain on a different octave from player 1).  Keep taking turns until someone makes a chain, by adding skips at the top or bottom, that is 7 letters long and wins!


Parking Lot Cars:
Draw a letter from the lot and park your car on the white key "parking space" that matches.  Works great with cars like these from the learning shop. Keep going until you run out of cars (or whatever counters you have).

Cowboys and Indians:

Start one tiny plastic character (ANY tiny plastic figures you have will do: Pokemon, animals, cowboys, princesses, etc.) at one end of the keyboard on a white key, and another at the other end.  Draw a tile out and move the low guy up to that key. Draw another tile and move the high guy down to that key.  Keep going until they meet (and battle, or shake hands, or whatever you pretend!)
   
Have a Game Idea?
We hope you use your ALPHABET PIECES every day and get great at identifying the white keys.  Do you have another game idea using alphabet pieces?  Send it to us and we'll share it with our blog readers!

- Gina Weibel, M.S.
Let's Play Music Teacher

*Thanks to Amy Brinton and Kendra Flake for additional game ideas.*