Showing posts with label notes. Show all posts
Tuesday, January 5, 2016
Say it, Play it! Reading and Sight-Reading From the Staff
In my previous post, In A Flash!, I explained how we use flash cards to help teach students to read notes on the staff. Students can look at the staff and quickly say the letter name of the note represented.
3 Step Reading
Of course the letter name is not the full meaning of the note on the staff. Letters are an abstraction that help us talk about keys and teach music theory. We absolutely can't get through class without having letter-names for notes, but the piano key is the real meaning behind the note on the page. Reading the note and playing it on the keyboard (Say it-Play it) is the really practical skill, the end result of several steps, we are driving at.
STEP 1: A new student reads the note and identifies it "This is F!" (in my class, I have them sing the pitch as part of our game). Our purple flashcards help them learn this skill.
STEP 2: The student holds a mental visualization of what "F" looks like. Our alphabet pieces games from Yellow semester help them learn this skill.
STEP 3: The student seeks and finds the matching note, in the correct octave, and plays it. Again, I have them sing the pitch "This is F!" for ear correction. What do we have to help learn this skill? Teeny tiny flashcards.
Teeny Tiny Flashcards
I was looking for a way to really practice STEP 3 in the decoding process, and was delighted find these teeny tiny note flashcards that are exactly the size of a piano key (you can print them for $2) or you can get a similar, free version here.
I printed a set and mounted them on a foam sheet, and cut them up. I introduced them to my daughter in groups just as she was learning the groups in 3rd year.
Games
I keep my tiny flashcards a little treasure chest on the piano and play games with my daughter to reinforce step 3 of the reading process. Just do one game for a few minutes each day instead of or in addition to your purple cards.
Say It- Play It- Lay It: Your LPM teacher likes to play "Say It- Play It". We just add one more step. Draw the card, say the letter, play it on the keyboard, and lay the card on the key to show you're done. Each time you play this game, decide how many cards you will do. As you get faster, increase the number of cards you do at each practice. Attempting the whole box at your first sitting can be daunting, so pick a number that will just take 3 minutes, and congratulate your student on getting faster each time. Alternatively, decide you will work for 3 minutes and see how many you can get done.
Bananagram: Each person gets 5 cards randomly. Ready, set, go! Put them on the correct keys as quickly as you can. When one person is done, they say "take two!" and everyone must take 2 more (whether you were done or not!). Continue in this manner until the box is empty...then give everyone enough time to finish placing the pieces in their hand.
Fix-it, Felix! This game works well if you have a toddler who is longing to help. Let your youngster arrange the cards on keys in the octaves you are working on (they will be laughably wrong.) Then, your student chooses one card, picks it up and moves it to the correct key, bumping off whatever card had been there. She then takes that card to its correct home, bumping off whatever card had been there, etc. If you get a point when a card goes into an empty slot, do a quick check to see if you have won (everything correct) or not (when you find a mistake, pick it up and start working again.) It's exciting if you can win in one run without hitting any restarts! Your toddler will love to clean up for you, too, if you cut a slot in an oatmeal can for her to mail the pieces into.
Crazy Composer Choose 5-6 notes randomly from the box and put them on the correct keys. Play the 5 notes. Then, play them in any order to create your crazy composition. You are allowed to duplicate notes and make up any rhythm, but you can only use those notes!
Sol-Mi Soundboard: Draw a card, play the note, and place it on the key. Sing that note as "sol" and follow with a minor-3rd step down to "mi". Yes, they key in which you sing will change but you should be able to sing a sol-mi anywhere, any time, any key (LPM Teachers practice this, too)! That's the joy of being able to hear and sing intervals. (play 'sol' then play 3 keys lower to hear 'mi'. The color of key doesn't matter...just count down 3). Repeat with other cards. No matter where you start, you can sing this interval, I know it.
Go Fish: Play this game once you have all of the treble and bass clef lines and spaces in your box. Each player starts with 4 cards. Ask another player, "Do you have any treble-clef-spaces?" If so, they have to give them over! If not, you "go fish" for a card. Once you have all of the notes needed to sing one verse of our treble, bass, line, space song, place them on they keys where they belong, then continue the game.
Where are We Going?
Wow, the 3-steps for reading notes seems to take a long time: too long to be useful if we play every note in a song like that. As I mentioned in our post on learning to read, we read most of the song by looking at intervals and chunks of patterned notes. We only need to spell-check a small percentage of notes in a song, so it's okay if those take a little more time.
With practice, you'll also get incredibly faster at finding individual notes. When I read new music, I don't take mental time to think of the letter name. Because I have been conditioned, I have dropped that middle step and the process is faster.
It's like when we first learned to read words: we always noticed the individual letters (C-A-T) and thought about what sound each letter represented. As we improved, we stopped thinking of the abstract names of the letters, and just focused on the sounds they represented, and eventually moved on to noticing the whole word as a chunk. Learning to read music has a similar progression. For now, work on getting fast at matching staff notes to keyboard keys!
Want to be a Sight-reader?
Some musicians have a great ear, some are excellent at reading, and at Let's Play Music we set our students up to do both!
Sight-reading is the ability to look at music and play it correctly without having practiced it. How can you become better at sight-reading? A recent study surveyed MTNA-certified piano teachers and found that while 86% thought sight-reading was important, only 7% said they addressed it systematically with their students.
So it seems the answer may still be elusive, or may be the same for learning to read written words: read, read, read! This means you'll need a stockpile of easy-to-play tunes or a website that generates them for you. Songs you can sight-read correctly are MUCH simpler than songs you can play, but need a bit of practice on. So, you'll need a stockpile of easy stuff to start with. You might spend a few minutes at each practice sight-reading a few pieces!
Franz Liszt, known as the best sight-reader of all time, has a few tips for you as you begin your sight-reading journey:
1. Focus on Rhythm: The audience can forgive a mistake in pitch, but not rhythm. If you miss a beat, the whole song will be off (especially if you're playing with an ensemble!). Keep the rhythm perfectly and do your best with notes.
2. Don't Stop: Remember rule 1? The audience and judges will forgive a wrong note or two, but if you stop and go back to correct it, it draws attention to the mistake and disrupts the flow of the piece (and your ensemble will leave you behind!) So RESIST the urge to stop and correct. For sight-reading, you must keep going. (If you are learning a new song and not trying to sight-read, learn it measure by measure for goodness sakes.)
3. Let the most difficult passage set the tempo: Your goal is to play the whole piece correctly. You've heard this music before, and you know there's a tricky bit in the middle, so start off playing slowly enough that you'll be successful on the tricky bits, too.
4.Learn to look ahead: When you drive a car, you don't only look at the pavement directly under your car, or just in front of the hood! To be safe, you look a few blocks ahead so you know what is coming in the next 4-8 beats. In music, push yourself to be looking at the measure beyond what you are actually playing, so you can process and prepare for it.
Only play any piece of music TWICE for sight-reading. After that, I'm guessing you'll start to memorize it. If you had a lot of errors BOTH TIMES you played it, choose something easier for your sight-reading efforts.
Good luck with your reading skills: Read, read, read, and over time the difficulty level of your sight-reading material will advance. Maybe someday you'll be like Liszt: able to sit down and play challenging pieces you've never seen!
-Gina Weibel, M.S.
Let's Play Music Teacher
Labels:
alphabet pieces,
composing,
flashcards,
games,
go fish,
keyboard,
keys,
liszt,
music reading,
note reading,
notes,
orange,
purple,
rhythm,
say it,
sight-reading,
staff,
tiny,
toddlers
Tuesday, March 10, 2015
Keyboard Geography: Get Crafty with Alphabet Gems
Back in the fall we introduced the idea of Keyboard Geography: Looking at the keys and noticing the patterns made by black and white keys. The black keys are SO important because without them, you'd have no way to visually distinguish the C's or F's or any keys at all!
You can guess that eventually your pianist will want to play songs without looking at her hands much, but before she gets to that point it is valuable to spend some serious time now looking at, learning, and internalizing what the keyboard looks like. Eventually, she'll be able to hold the image of where her fingers are (and where they need to go next) in her mind's eye. Combining her mental image of the keyboard with her muscle memory (read about it here and here) she'll be able to play without looking down very often.
Visual and Kinesthetic Learning
In class, your child practices singing the musical alphabet to learn the pattern of the keys, and practices the Kit-Kat Keyboard chant to start practice matching the keys to the keyboard. Both of these activities are primarily aural but become a visual way of learning when keyboard matching comes into play. To strengthen the learning, we provide even more pathways (read about the learning process here) for mastering information by giving students kinesthetic ways to play with the skills.
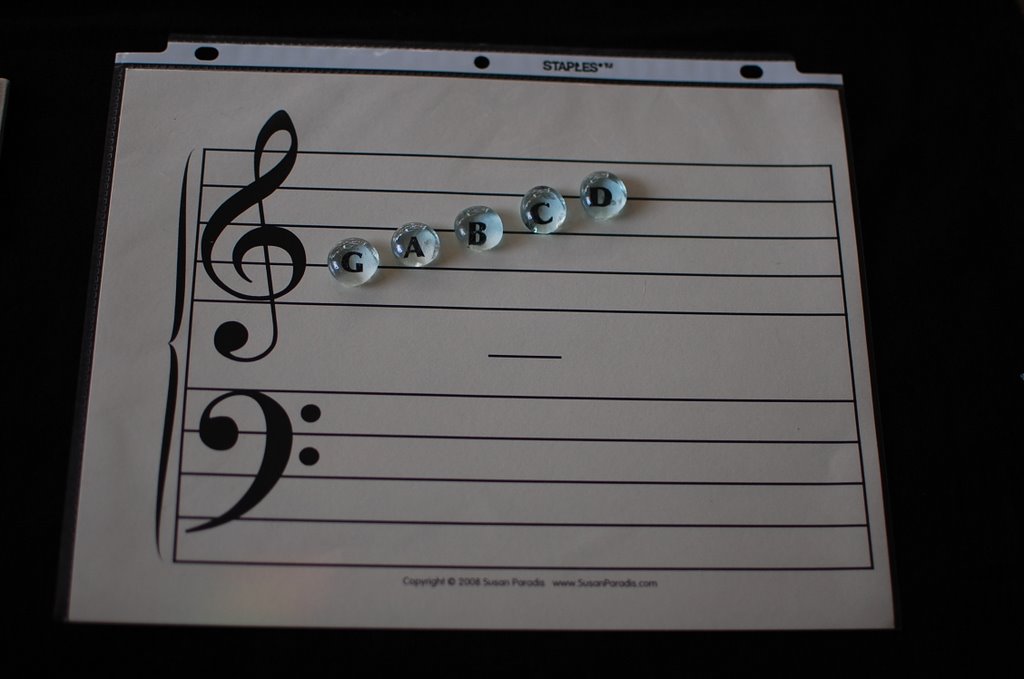
Alphabet games help make drilling "what's the name of this key?" fun and engaging AND because they involve your child moving a tangible object over to a tangible key, this knowledge sticks better than if we only used flashcards.
Whenever possible, take it one step further by playing the pitch of the note after identifying the alphabet letter, and matching it…"Yes, that was a D, and a D sounds like this…DEEEE." We try to find ways to see it, hear it, and get physically involved as we practice it.
Where Do We Go Next?
Next fall your student will start learning to read every single note on the staff, and match each note to its exact key on the keyboard. Of course, it's going to be a very rough challenge if your child reads "treble D" off the staff but can't find a D on the keyboard. This is one reason we spend time on key names now; it's the prerequisite for advanced music reading.
I like to point out that the alphabet names of the notes and keys are an abstract concept created to help us read music. It IS possible and necessary to read music by matching "that note" with "that key" correctly without identifying the name of "that note". (Read more about it here)
But these key names are critical to give us the way to talk about the notes and keys and be specific as we teach the advanced theory coming next year (changing key signatures, transposing, adding sharps and flats, etc.)
Great Ways to Play
Now that you're motivated, you'll definitely want to check out the list of different games using alphabet pieces. (CLICK HERE). You'll see everything from Cowboys and Indians to Frogger and Go Fish: all games that will encourage visual matching and active learning.
Get Crafty
Now, for a crafty way to make your pieces the cutest and most gorgeous ever (also preventing them from falling between piano keys,) try this option: making Musical AlphaGems!
Materials
- Clear glass gems (each approx. 1/2 inch in diameter): avoid ones that are too big to fit on your piano key!
- Cardstock alphabet (last page of your Yellow Arrows songbook)
- Acrylic spray (option)
- Clear silicone adhesive (sticks well to glass and is less smelly than other strong glues)
- Workspace covered with some newspaper
- Scissors
Instructions
- Optional: Before cutting out the alphabet circles from the printable, spray the backside of the cardstock paper with a few coats of acrylic spray. This will help seal the paper and make your gems last longer.
- Using a pair of scissors, cut out alphabet circles to fit your gems. Too small is better than too big.
- Examine each glass gem before using to check for imperfections. Toss any that are chipped or have odd designs that might affect how easily you can read the alphabet letter through the glass.
- Put a dab of silicone glue on the bottom of a glass gem and then gently press the gem onto a cut-out circle so that the printed alphabet letter shows through the glass. Gently wipe the gem’s edges on the newspaper workspace to remove any excess glue. Allow the gems to dry upside down.
That's it! Go have some fun with your alphabet games.
-Gina Weibel, M.S.
* Musical AlphaGems was first seen at www.colorinmypiano.com
-Gina Weibel, M.S.
* Musical AlphaGems was first seen at www.colorinmypiano.com
Labels:
2nd year,
alphabet,
alphabet games,
keyboard geography,
keyboard map,
music reading,
notes,
tactile,
visual,
white keys
Saturday, December 13, 2014
Learning to Read Music
I had spent months at the library investigating different methods for teaching reading, searching for the one that would work for my family. The reading method we eventually fell in love with had a few key facets that made it a huge win for my son (and all subsequent siblings).
A short time later, a Let's Play Music teacher moved into our neighborhood and my little son began to take classes and learn to read music. I was so ASTONISHED when I heard the theories behind the Let's Play Music method for teaching musical reading, I nearly fell out of my chair! They were parallel to important truths I had found while teaching my son to read books.

1. Get Some Exposure
Not surprisingly, I taught my son to read books in his native tongue, not Spanish or any other language. The work of decoding text is tricky, but the motivating drive is that when the laborious work of sounding out letters is done, the text is going to mean something that makes sense. Since his infancy, I'd also been reading him story books and pointing out words to him. By age three he'd had a thousand books read to him; when I proposed having him read the books himself, he had a good understanding of what that would mean.
If we went to music lessons as adults, we might expect to show up, have the logistics of note-reading explained to us, and get down to the business of hammering out tunes. Before our little children can digest such a blunt approach to reading, they need exposure to melodies and tonalities and patterns that they will soon be reading, so that these melodies can mean something.
2. Learn How Notes Work
I taught my children the sounds that alphabet letters make and the sounds that the consonant clusters make before focusing on the names of the letters. Eventually it's important to know the letter names (an abstract concept) so we can talk about letters and discuss spelling and do intellectual things like that. But when one is actually reading, he's not thinking about the names of those things...he is just focused on what they mean and how they work as a tool. Letters are just tools that represent sounds; you don't need to know a whisk is called a whisk in order to make meringue!
In Let's Play Music class, our students are starting to read on the staff in Year 1 and they don't even know ANY NOTE NAMES on the staff. Shocking? Not at all. Your kiddo can become a pretty good note-reader by paying attention to the patterns of notes as they baby step and skip, up and down. Being able to correctly and easily move from one note to the the next is the essence of reading music. A student must quickly process the relationships between notes in order to read music; the student focuses on how the notes move and relate and work as tool BEFORE focusing on abstract ideas like names for notes.
Stepping and skipping patterns are the first relationships students recognize and perform. The next fantastic tool will be the ability to quickly recognize intervals between notes, a huge focus in Year 2 (read more about intervals here and here).
3. Learn some Common Patterns
In the English language, there are a bundle of common words that don't make phonetic sense to a four-year-old. The word SAID is one of the first sight words my son learned by rote. Once he had this word in his memory bank, he could effortlessly read it and flow easily past it, spending more effort on the tricky new words in stories. Even phonetic words, once they are read many times, begin to meld into single items (instead of individual letters) in our fantastic brains. We don't see the letters anymore- we see the WORD as a whole chunk.
Similar to the English language, the language of music also has some very common "words". These musical chunks, or melodic patterns, show up ALL THE TIME in music. The Let's Play Music program introduces the most common melodic patterns (mi-re-do, sol-fa-mi-re-do, sol-la-ti-do, sol-sol-do, sol-mi-do) as if they are sight words. Experienced students will read three or four notes as a cluster of notes; they quickly internalize the pattern represented and play it as a "word" instead of individual notes. This ability stems from both mental repetition and muscle memory from playing these patterns and handshapes frequently (blog post on muscle memory).
4. Learn some Anchor Notes
So, midway through Year 1, your student can play melodies of steps and skips correctly, but it only comes out as intended if the student begins on the correct note! Every note on the staff represents exactly one white or black key on the keyboard; it's critical to find THAT ONE KEY.
Before teaching all the notes on the staff, Let's Play Music teachers introduce some anchor notes. In Year 2, students learn Middle B,C,D, Treble C, and Bass C, and quickly match between the staff and keyboard. As they play piano, they check for accuracy of the first note in a "chunk", then play the remaining notes based on patterning. This is very evident in the second year song How to Skip; the student identifies the first note of each measure, then plays skips up and down to complete the measure.
Anchor notes are these first notes on the staff that the student unfailingly matches to the correct key on the keyboard. Any note now can be paired to its key by considering the relationship to the anchor ("Oh, I see the key I need is one skip above Middle C, and I know where Middle C is!"). Thinking in this intervallic way is not only a quick way to find the keys, but an excellent way to mentally internalize the distance between notes while your hand is likewise memorizing the physical distance.
5. Find Any Key
By Year 3 of Let's Play Music, your child will be ready to transpose (move Do somewhere other than C), ready to play complex pieces, and ready to build triads and chord inversions. It's finally and absolutely necessary that we be able to intellectually talk about the notes. The mnemonic song Treble, Bass, Line and Space helps students remember the note names represented by each line and space on the staff. I call this note-spelling since the names are alphabet letters. Teachers will quiz students to be sure they can quickly identify these note names; students will need to do this in order to understand the theory of Year 3.
I sometimes see a division in Year 3 between students who can sight-read music well and those who cannot, and the fast note-spellers are NOT always the best sight-readers. Fast note-spellers are sometimes tempted to name every note, then match to every key of the song while playing. Note-spelling has its place in reading: to identify the first note of each "chunk". The rest of the music should be read by looking for patterns.
6. Start With Success
A huge element that I love about our reading program is the way my children experience immediate success. Most English words are not perfectly phonetic, but we learned a way to write them so they could be decoded phonetically: put a line above a vowel if it is a long vowel, draw a letter tiny if it doesn't actually make a sound, glue two letters together if they make a cluster sound, etc. My son felt FANTASTIC when he was able to immediately start reading real content. He still had a short list of practice words each day, but there was no reason to wait for months before letting him read real stories with meaning. Intrinsic motivation was high! He could see that he was really reading, and he wanted to keep at it, and he read daily because he loved it.
After a few months, the helpful hints and modifications to words were taken away- but by then he had internalized the many wacky phonetic rules of English and could still read the words, and correctly infer how to read new ones. Success!
In Let's Play Music, students begin keyboarding by playing chords. They are still practicing daily at reading and playing melodies, but we want them to have immediate success at the piano, too! By playing accompanying chords while singing the melodies, the student creates the harmony and the complexity of real music! There is no reason to wait months before playing something that sounds full and rich and big and exciting.
I remember my own early piano lessons with my primer-level book. For months I languished with small-sounding tunes, dreaming of one day playing some real songs. Nowadays, my students get the joy of success early on, and it motivates them to strive for music success, even long after they graduate from Let's Play Music.
7. In Loving Arms
I didn't mind teaching my son (and eventually his siblings) to read. It was a commitment, for sure, but it meant that every day I would hold him snuggled in my lap for 15 minutes. We made up silly games to get through the practice words and we had curious discussions about the silly stories he read. I shared with him my joy at seeing his progress and told him I would always welcome hearing him read me a story. We took turns reading passages, and reading was our special time together.
Is it any surprise that reading music can be a similar experience for a child? If you, Mom and Dad, don't read music yourself, take this opportunity to learn along with your child during your Let's Play Music years. Sit at the bells or keyboard together and play duets, take turns reading melodies, and make up songs together. Much of the long-term success of this early music education is wrapped up in your child's emotional experience with learning music.
If I'm asked why the Let's Play Method of teaching note-reading really works, I can get right down to it and answer, "because the children feel loved." The Let's Play Music program was carefully crafted to help your child learn music AND hopefully help you build a strong, loving family at the same time.
-Gina Weibel, M.S.
Let's Play Music Teacher
EDITOR'S NOTE: I didn't set out to write a commercial for my favorite reading method, but I truly have loved using Teach Your Child to Read in 100 Easy Lessons and you can buy the book used for $5! Just to be clear, I have no evidence that other LPM teachers endorse this method. If you'd like to discuss it with me, leave comments below. My favorite method for handwriting is Handwriting Without Tears, and of course my favorite method for music is Let's Play Music!
Labels:
ear training,
music reading,
notes,
reading,
sight reading
Tuesday, February 18, 2014
Keyboard Geography: Alphabet Pieces Games
CUT the rectangle of alphabet letters out of your yellow songbook. YES, cut your book! Trim a piece of adhesive-back foam (like this kind) to match the size of your letters. (If you happen to be making a bunch of these, you can fit 3 rectangles on a 8"x12" foam sheet.) Affix the letters to the foam.
Need a replacement printout of the letters? Grab one HERE.
Next, cut the strip of Cs, trim them apart, and have your child place each of them on a C on the piano. Repeat with D, and each letter, then brush them off and store them in a cute box or container on your piano.
Now you're ready for some fun! *If you decide to skip the foam, that's okay, too. In that case, to prevent papers from falling between the keys, always brush them off toward you.*
Need a replacement printout of the letters? Grab one HERE.
Next, cut the strip of Cs, trim them apart, and have your child place each of them on a C on the piano. Repeat with D, and each letter, then brush them off and store them in a cute box or container on your piano.
Now you're ready for some fun! *If you decide to skip the foam, that's okay, too. In that case, to prevent papers from falling between the keys, always brush them off toward you.*
At the beginning of each practice, play an alphabet games for 2 minutes to get warmed up. Here are a few games to change it up each day of the week.
Alphabet Race:
Have your child take one alphabet piece from the box and quickly set it on the correct white key. Continue until the box is empty! Time yourself and see if you can beat yesterday's time. For students who struggle, have the student look at the picture (key-group diagram) in the back of the Yellow Songbook and form his own visual conclusion.
Take a Second:
Have your child choose two alphabet pieces and place them on the keyboard. Identify what interval they make, and play the interval. If it's anything other than a 2nd, play again! The game ends when you take a second to make a 2nd.
Alpha-frogger:
Pretend each alphabet foam piece is a tiny frog. Have your child choose an alphabet frog, then hop it across the keyboard helping froggie find all keys of that letter. These frogs don't croak- each time the "frog" lands on one of her special lily pads, sing the letter (on pitch!).
Hiss:
Place one letter on the keyboard as a starter snake. Each player takes turns drawing a letter and checking to see if they can add it to the head or the tail with baby steps to make the snake longer. If not, start a new snake somewhere else on the keyboard. Anytime someone makes a snake with 8 or more segments, they get to remove it from the keyboard and keep the points (1 per segment)! Play until the pieces run out. It's pretty cool if you are able to join 2 snakes by drawing the missing link between them, and win a really long snake! You might enjoy non-piano Hiss, too.
Go Fish:
Each player starts with 3 alphabet tiles hidden in his hand. Try to make matches by asking the other player: "Do you have a.." then PLAY the note on the piano to make your request. If you end up with an empty hand, draw 3 more tiles. Keep playing until the tiles are all gone, and see who got more matches.
Silly Songs:
Have your child draw out 5-10 alphabet notes and line them up along the music stand. With her right hand in C position, play each note with the finger touching that key. If the note is a B, slide the thumb down to yellow position to reach it; if the note is an A, slide the hand into blue position to reach it. This might be a wacky song, or it might be something cool. If you like the tune, play it again!
Super Skippers:
Your child draws out an alphabet letter and places it on the keyboard as a 'starter'. Next, she chooses another piece and checks to see if it can make a skip up or a skip down from the starter. If not, discard it and player 2 gets a turn to play (player 2 should start her skipping chain on a different octave from player 1). Keep taking turns until someone makes a chain, by adding skips at the top or bottom, that is 7 letters long and wins!
Parking Lot Cars:
Draw a letter from the lot and park your car on the white key "parking space" that matches. Works great with cars like these from the learning shop. Keep going until you run out of cars (or whatever counters you have).
Cowboys and Indians:
Start one tiny plastic character (ANY tiny plastic figures you have will do: Pokemon, animals, cowboys, princesses, etc.) at one end of the keyboard on a white key, and another at the other end. Draw a tile out and move the low guy up to that key. Draw another tile and move the high guy down to that key. Keep going until they meet (and battle, or shake hands, or whatever you pretend!)
Have a Game Idea?
Draw a letter from the lot and park your car on the white key "parking space" that matches. Works great with cars like these from the learning shop. Keep going until you run out of cars (or whatever counters you have).
Cowboys and Indians:
Start one tiny plastic character (ANY tiny plastic figures you have will do: Pokemon, animals, cowboys, princesses, etc.) at one end of the keyboard on a white key, and another at the other end. Draw a tile out and move the low guy up to that key. Draw another tile and move the high guy down to that key. Keep going until they meet (and battle, or shake hands, or whatever you pretend!)
Have a Game Idea?
We hope you use your ALPHABET PIECES every day and get great at identifying the white keys. Do you have another game idea using alphabet pieces? Send it to us and we'll share it with our blog readers!
- Gina Weibel, M.S.
Let's Play Music Teacher
*Thanks to Amy Brinton and Kendra Flake for additional game ideas.*
Labels:
2nd year,
88 keys,
alphabet,
notes,
piano,
piano lessons,
practice,
white keys
Subscribe to:
Posts (Atom)